❄❄❄Update: The complete pattern for Merry and Bright is now available for download on my Etsy shop. The pattern includes material requirements, cutting chart, step-by-step instructions, full color diagrams, paper piecing foundation patterns and embroidery templates to help you on your way. Click here to view the pattern.❄❄❄
Welcome to Day 1 of the 2016 Christmas Quilt-along! Da datta da!! (imagine a trumpet fanfare at this point!)
This year we’ll be making a 28″ x 34″ wall hanging. Every other day between now and December 23rd, I’ll be unveiling a new component or embellishment for our quilts. We’ll start off with traditional piecing, move into some paper piecing, and wrap up with simple embroidery.
This is the color palette that I chose for my quilt—I’m trying for a happy, Christmas candy kind of look—but feel free to choose whatever color palette appeals to you. Hint: you’ll probably want to have at least a couple of green prints to work with.
Once again, here’s a complete list of the materials that you’ll need for this project:
- 6 Fat Quarters – 3 green prints and 3 red prints (I’m actually substituting a pink FQ for one of the reds because I’m going for a Christmas candy kind of look)
- 1 6″ x 6″ square gray print (mine looks like a solid, but it’s actually got a subtle print)
- 1 yard background fabric (mine is the white/pink micro dot. All of the embroidery we’ll be doing is on the background fabric, so you’ll want to choose a background fabric that the embroidery will show up against—nothing too busy, think subtle print—and if you can’t find a print you like, a solid white will work just fine!!)
- 1 yard backing fabric
-
⅓ yard binding fabric
-
34″ x 40″ piece batting
-
embroidery floss to match your fat quarters (mine are (from top to bottom) DMC’s 817, 666, 3832, 937, 470 and 166).
Also helpful: washout marking pen, embroidery hoop and needles, and basting spray.
Before we get started with Day 1’s block, I thought it might be helpful to first get organized. I’ve made up a cutting chart for the 6 print fat quarters that we’ll be using for this project. We’ll be cutting all 6 fat quarters in the same way. You’ll end up with a few extra patches if you decide to cut according to the chart, but it’ll really be a time saver because you can layer your fat quarters and cut 2 or 3 at a time. If you decide not to pre-cut your fat quarters, don’t worry, you can cut as we go.
Here’s a
link to the cutting chart pdf. Note: your fat quarter may be larger than the 17″ x 19″ dimension I used for the cutting chart. There’s no need to pre-cut your fat quarter to this size.
Ok, fabrics in hand? Irons at the ready? Let’s get started!
Referring to the cutting chart, from each fat quarter cut:
1. 2—2½” strips along the long side of fat quarter. Cross cut into:
- 14—2½” x 2½” squares
- 2—1½” x 2½” rectangles
2. 1—5″ strip along the long side of fat quarter. Cross cut into:
- 2—4½” x 5″ rectangles
- 1—3″ x 5″ rectangle
- 2—3½” x 3½” squares
- 1—1½” x 2½” rectangle
3. 1—2¼” strip along the long side of fat quarter. Cross cut into:
- 2—2¼” x 3¾” rectangles
- 2—2¼” x 3½” rectangles
- 2—2¼” x 2¼” squares
4. 1—1½” strip along the long side of fat quarter. Cross cut into:
- 1—1½” x 4½” rectangle
- 1—1½” x 3¾” rectangle
- 3—1½” x 3″ rectangles
- 1—1½” x 1½” square
As I cut my patches out, I sorted them according to size and labeled them using sticky notes.
I also decided to pre-cut a couple of strips from the yard of background fabric as a little insurance for the quilt’s inner borders.
From the background fabric, cut:
- 1 strip 9″ x 30″ along the lengthwise grain of fabric (along or parallel to the selvage). Note: the selvage should not be included in this measurement, so cut it off first and then cut your strip.
- 1 strip 8″ x 23″ along the lengthwise grain of fabric
Set these strips aside for later use and we’ll cut the rest of the background fabric patches as we go.
And now, without further ado…
Day 1 – Pinwheel Blocks
We’ll be making 7—3″ x 3″ blocks (3½” x 3½” unfinished).
You’ll need:
14 assorted print 2½” x 2½” squares
14 background fabric 2½” x 2½” squares
To make your pinwheel blocks:
1. Gather 7 sets of 2 print 2½” x 2½” squares and 2 background fabric 2½” x 2½” squares. Note: each set should contain 2 of the same print 2½” x 2½” squares.
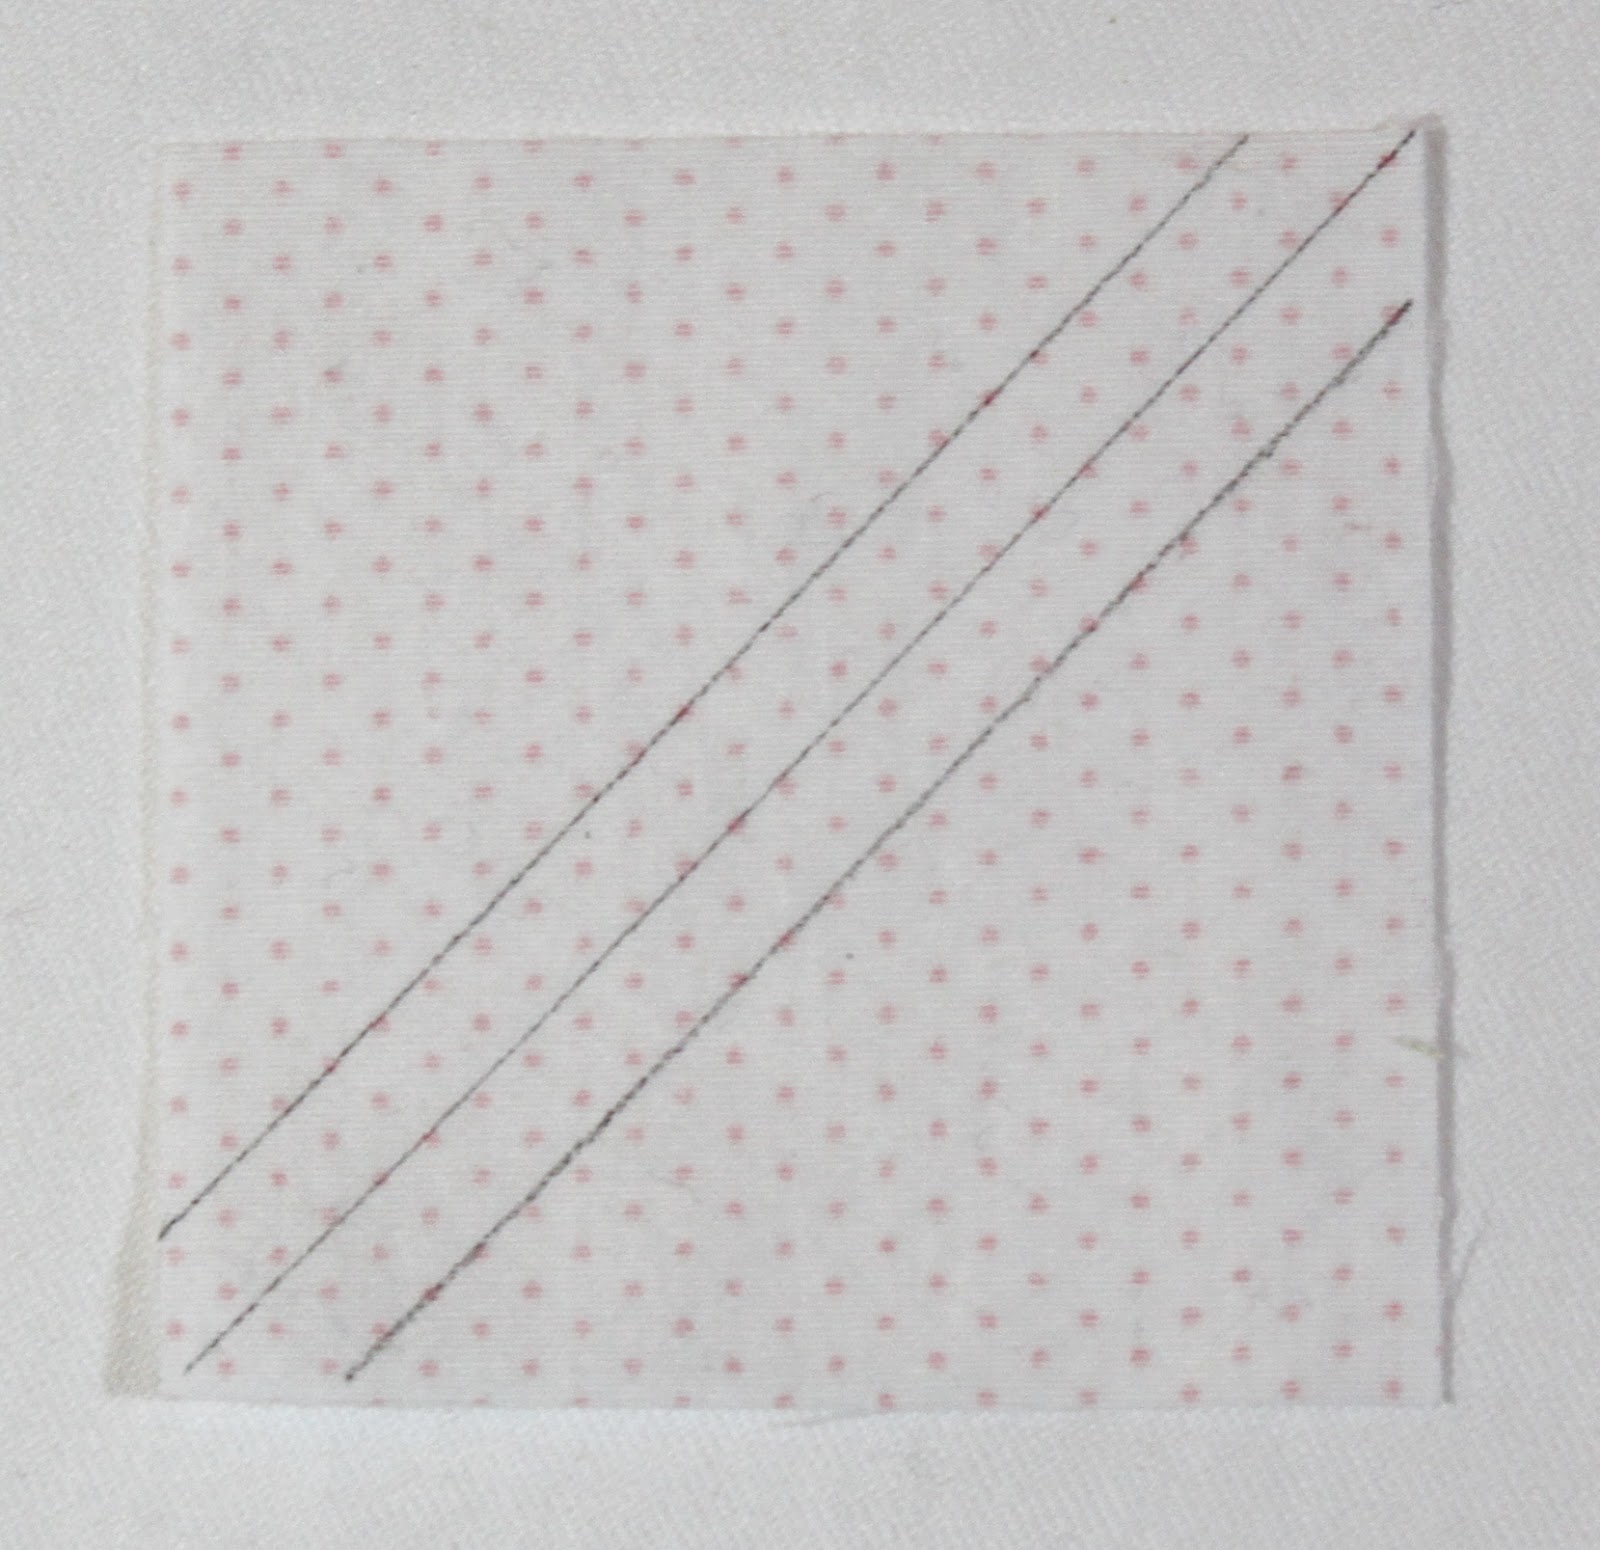
2. On the wrong side of each of the 14 background fabric 2½” x 2½” squares, lightly draw a diagonal line from corner to corner. Then draw a line a scant ¼” on either side of the center diagonal line.
3. Layer a marked background fabric 2½” x 2½” square atop a print 2½” x 2½” square with right sides together and stitch on outer two drawn lines.
4. Cut above unit in half diagonally on center drawn line.
5. Press above units open to create two half square triangles. Note: seam allowance should be pressed toward the darker fabric.
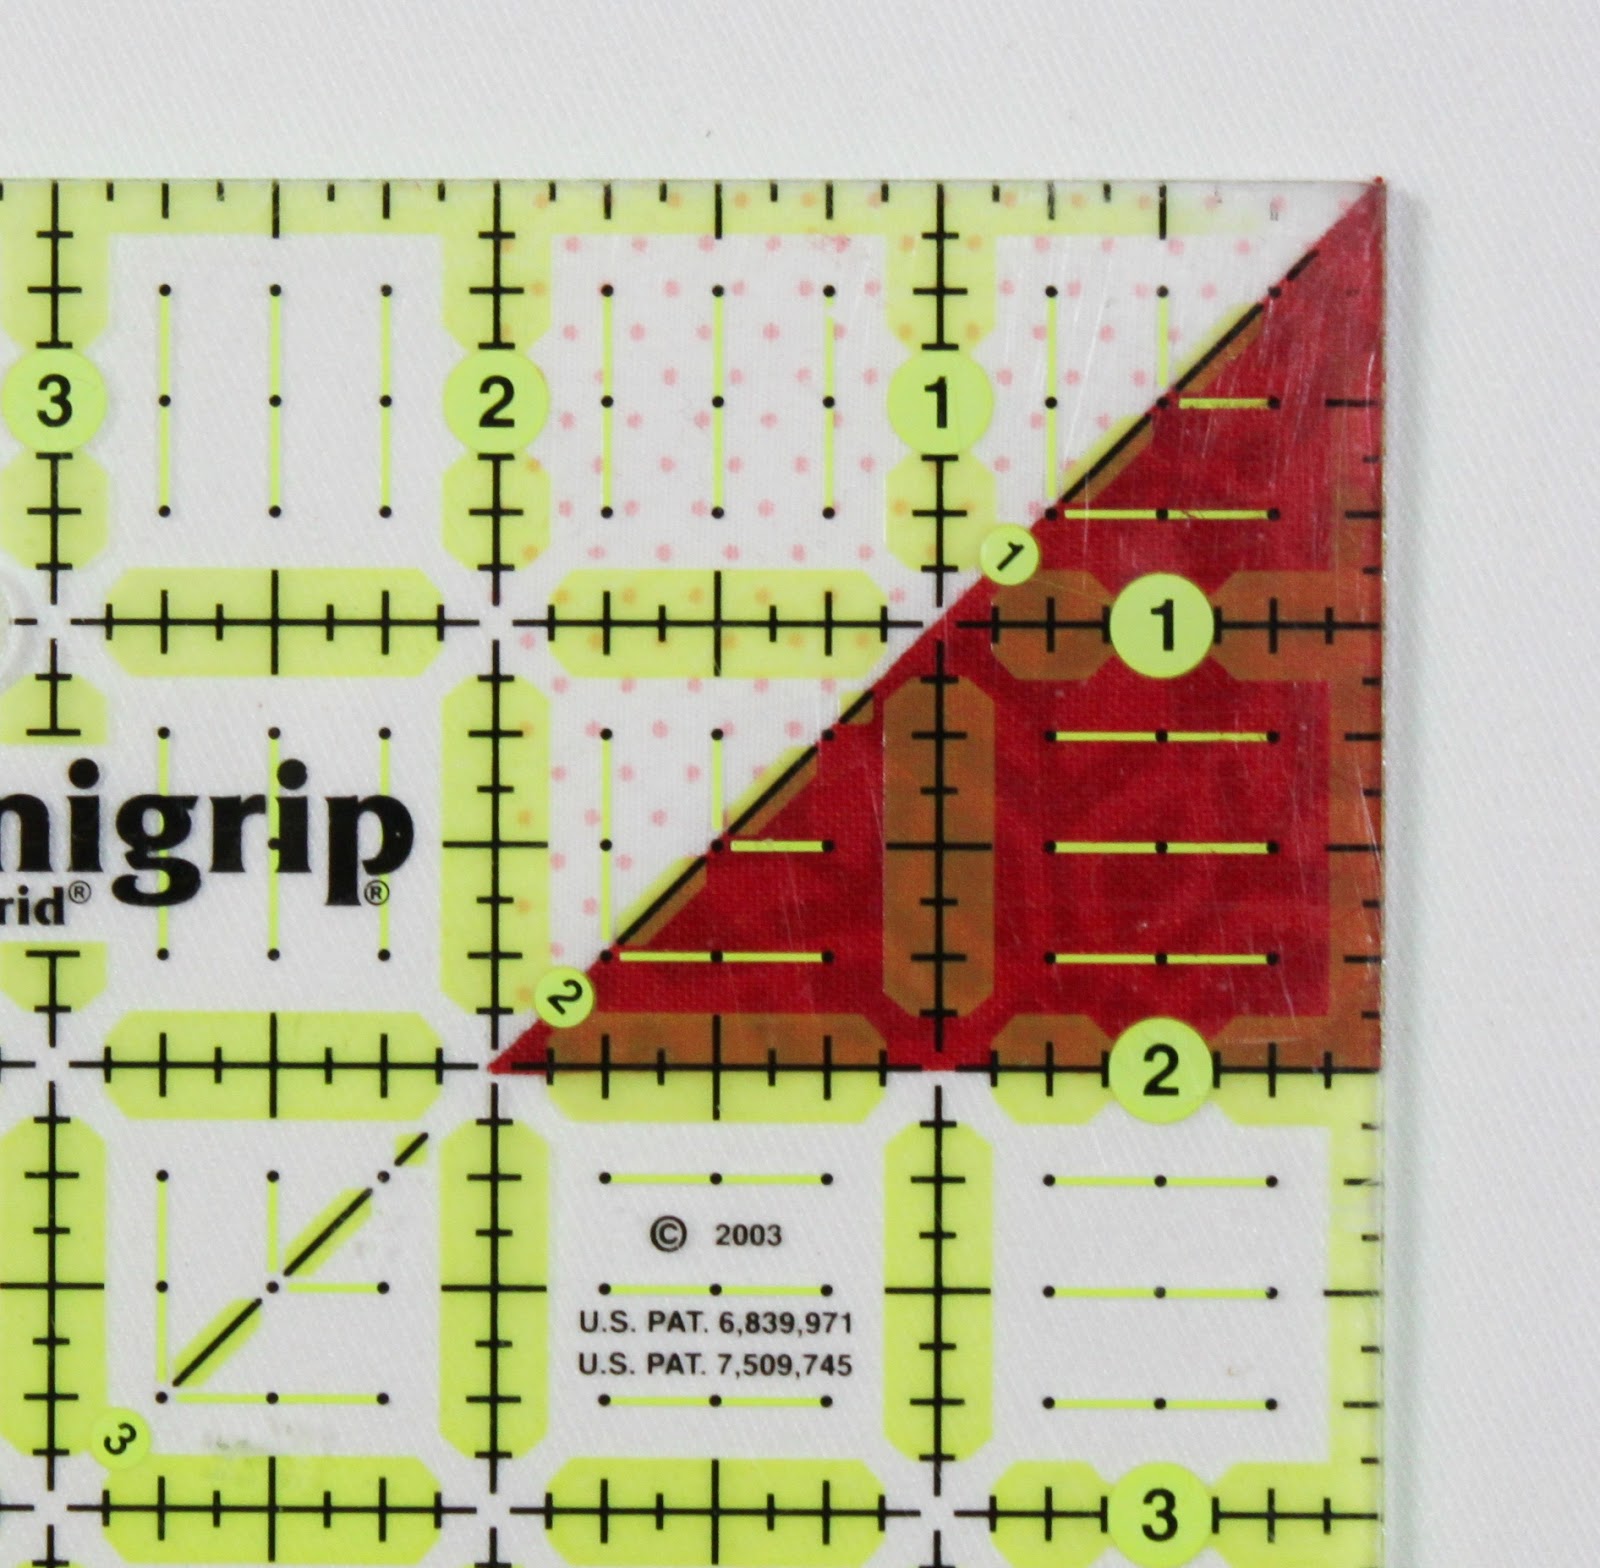
6. Trim half square triangle units to 2″ x 2″ unfinished. It helps to use a ruler with a 45° line on it. Before trimming, make sure that the 45° line runs along the diagonal seam of the half square triangle unit. Trim the right and top edges of the half square triangle unit.
7. Turn the half square triangle unit 180° and trim the remaining two edges in the same manner as above, again aligning the ruler’s 45° line with the diagonal seam.
8. Repeat steps 3-7 to make 2 additional matching half square triangles.
9. Gather 4 matching half square triangle and lay them out in 2 rows of 2 each as follows:
10. Stitch together in rows, pressing seam allowances toward the darker fabric.
11. Stitch rows together to make pinwheel block measuring 3½” x 3½”. Note: to reduce bulk at the center junction, fan your seam allowances as indicated.
12. Repeat steps to make 7 pinwheel blocks. Cute, aren’t they?!
Phew! That was a lot for Day 1! But I think we’ll be happy that we got so much of the cutting out of the way already!
See you back here Saturday for Day 2!


Comments on this entry are closed.
This looks like such a fun mystery project for Christmas. Thank you for making this tutorial available to all of us!
Thanks for the QAL – looking forward to the finish.Patti
Thank you, Julie and Kountrypat for following along!! Jen
Cute little pinwheels 🙂 Thank you.
Thank you for doing this ! I have only made one quilt top before and now I'm plugging away at this and I am so excited! I have wanted to quilt since I was a teen and now at 45 I'm giving it a try. Your instructions and pictures are soooo helpful for me! THANK YOU and Merry Christmas!
I've not been reading my e-mails lately. So, I'm behind as usual! I love your fabrics ~ they really are merry & bright.
Glad you're following along, Jackie!
I'm thrilled that you're doing the quilt-along with us, Pam! And I'm so happy that you're giving quilting a try again! You're going to love it!! Merry Christmas to you too!
Thank you, too!
Thank you. I have been searching for a Christmas wall hanging!
I have only just found your blog thru pinterest… picture of your beautiful "Bright and Cheery" Quilt pattern. Absolutely gorgeous…. just what I have been looking for so long…. I have downloaded the pdfs and kept all instructions. I am presently living in West Africa…. I will source beautiful fabrics for this when I return to Australia in 2019 and stitch it…. thank you again so much Jen… love what you are creating,,, sending hugs Pamela
Thank you so much for your comment, Pamela! I hope you have fun making the quilt and that you'll send me a photo when you're finished!!