Welcome back for Day 6! Today’s a big day because after 5 days of piecing blocks, we’re going to assemble our quilt centers! So exciting!!
Without further ado, here’s where we’re headed…

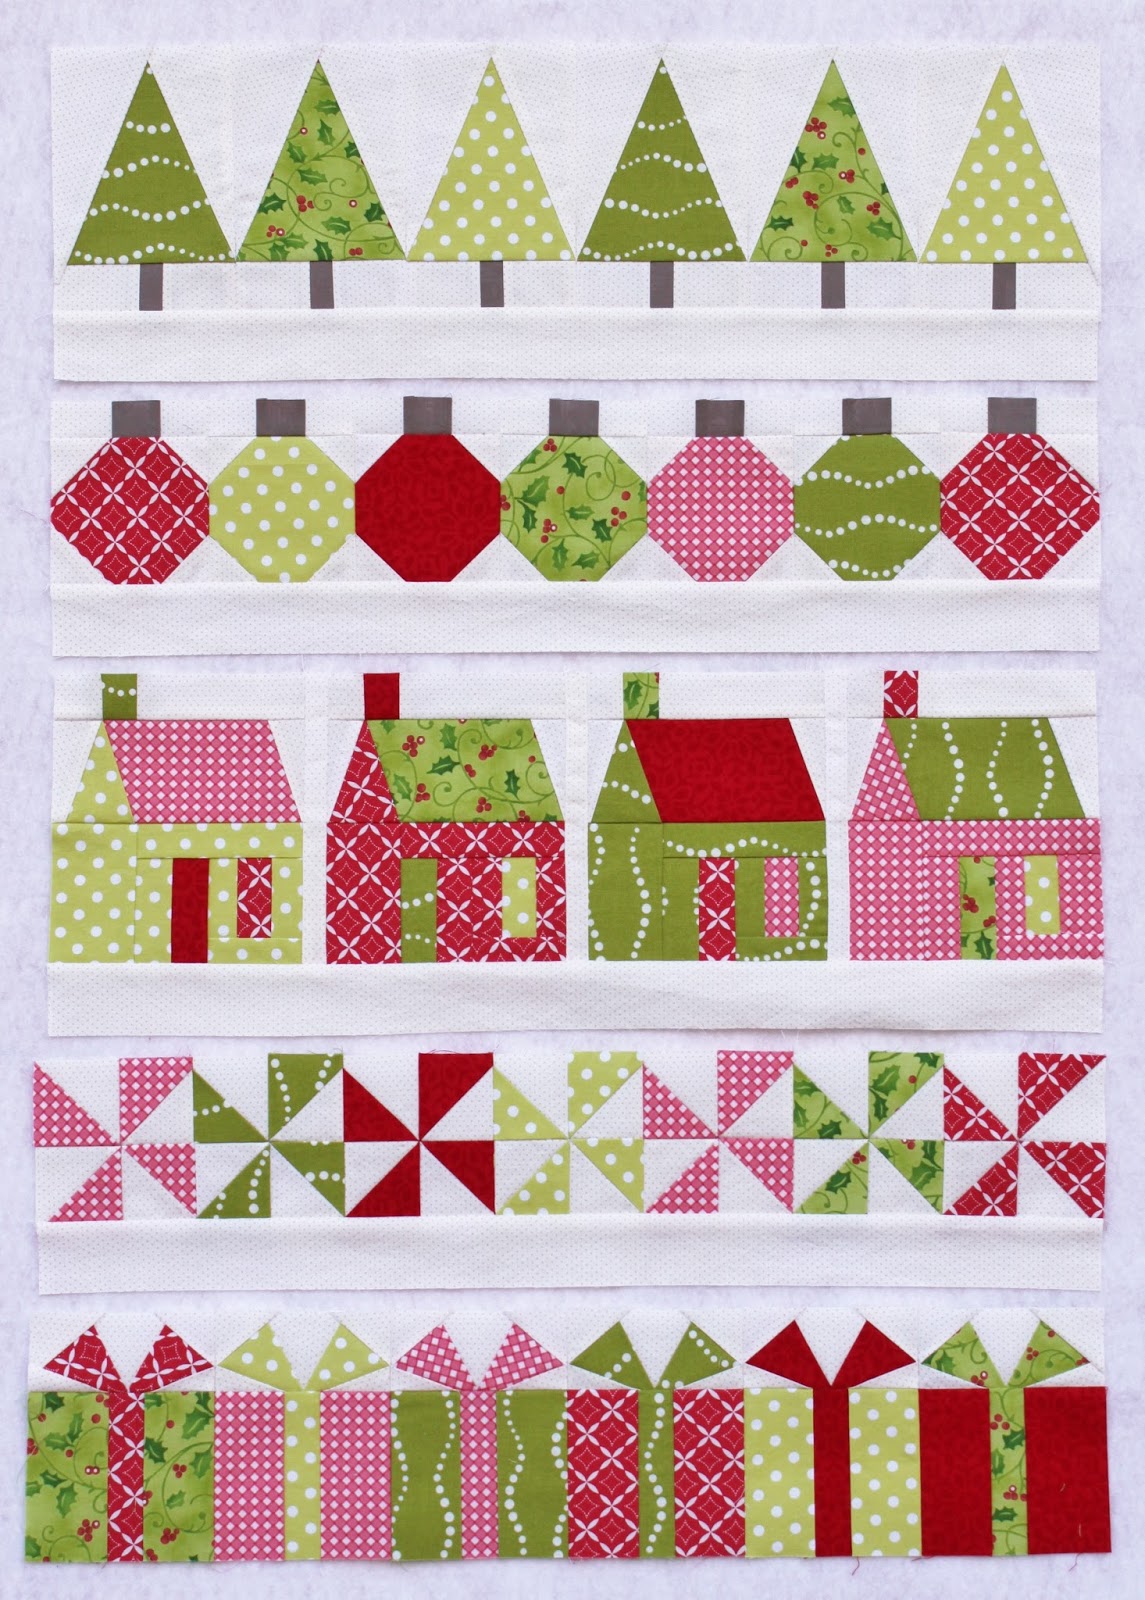
As you may have guessed, we’re making a row quilt! Ta da!!
It looks like we’ve got a lot of work ahead of us today, but I think you’ll find that it comes together really well.
Here’s what you’ll need to assemble your quilt center:
Gather all of your blocks. You should have:
- 7 pinwheels (Day 1)
- 7 ornaments (Day 2)
- 6 Christmas trees (Day 3)
- 6 gifts (Day 4)
- 4 houses (Day 5)
- and a partridge in a pear tree (just kidding!)
From your background fabric, cut:
- 3—1″ x 6¼” rectangles
And from the 8″ x 23″ background fabric strip that you cut and reserved on Day 1, further cut:
- 4 strips 1¾” x 21½”

Now that you have all of your components, you may want to take a few minutes to lay out your quilt center on a design wall or other flat surface. This step actually took me longer than a few minutes because I kept oohing and aahing over my blocks. You’d think I would have picked up on the fact that my red house’s door was in the wrong place at this point, but no…. In any event here’s what my design wall looked like when I finished.

Once you are happy with your layout, it’s time to assemble your quilt center. Let’s start at the top:
1. Stitch your 6 Christmas trees in a row. If you haven’t already done so, carefully remove the foundation paper from behind the trees. Press seams open.
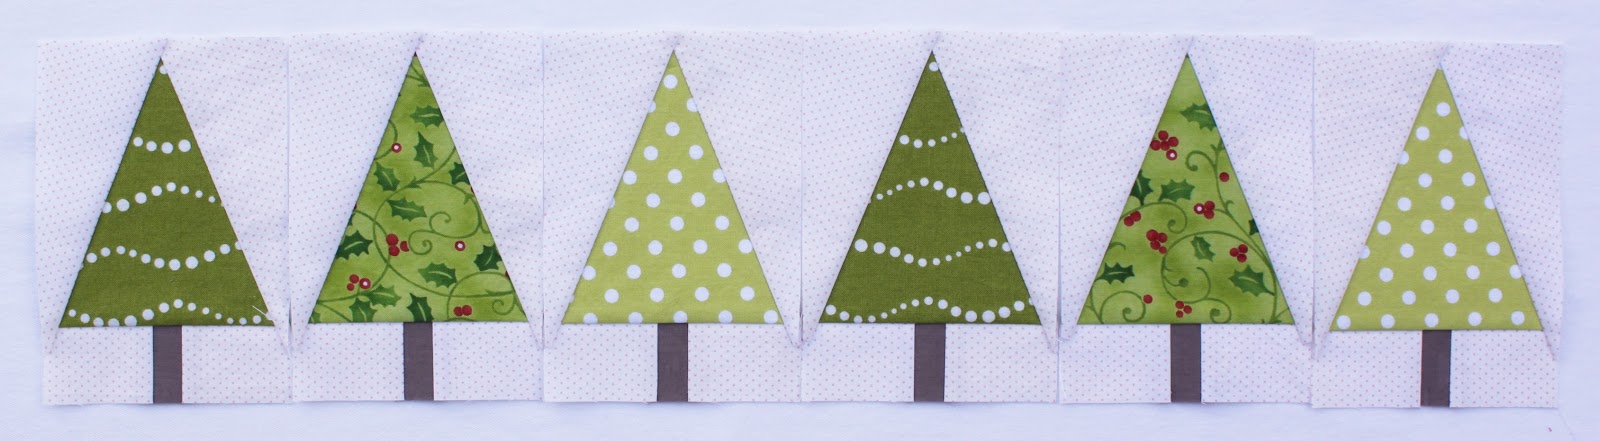
Your row of Christmas trees should measure 5¾” x 21½ unfinished.

2. Stitch your 7 ornaments in a row. Before stitching this row, I took my green ornaments and repressed the seam allowance between the snowball block and the ornament tops towards the ornament tops in order to help the seams nest a bit better with the adjacent red ornament blocks. After stitching your row, press the seams open.
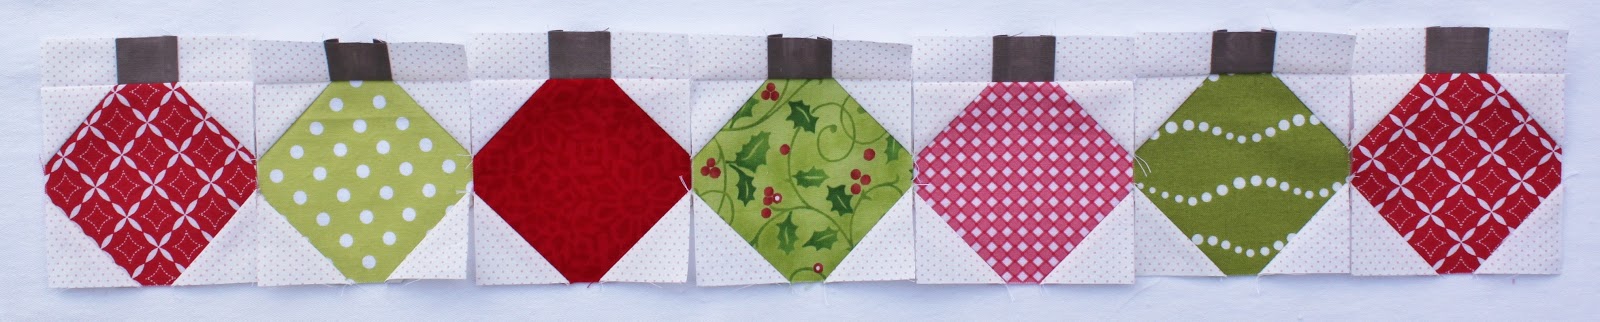
Your row of ornaments should measure 4″ x 21½” unfinished.

3. Gather your 4 houses and 3 background fabric 1″ x 6¼” rectangles and lay out in a row with 1 background fabric 1″ x 6¼” rectangle between each house. Stitch and press seams towards the background fabric 1″ x 6¼” rectangles.

Your row of houses should measure 6¼” x 21½” unfinished.

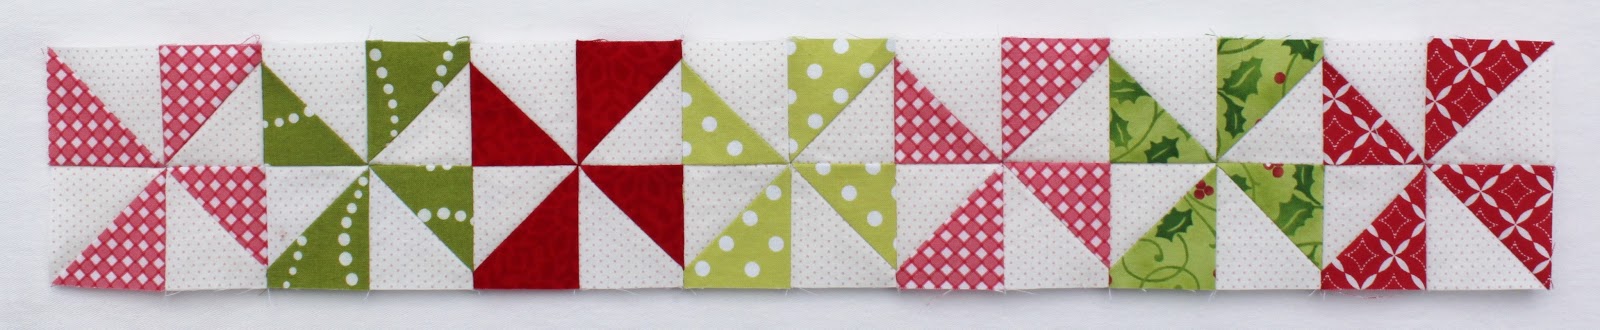
4. Stitch your 7 pinwheels in a row. Press seams open.

Your row of pinwheels should measure 3½” x 21½” unfinished.
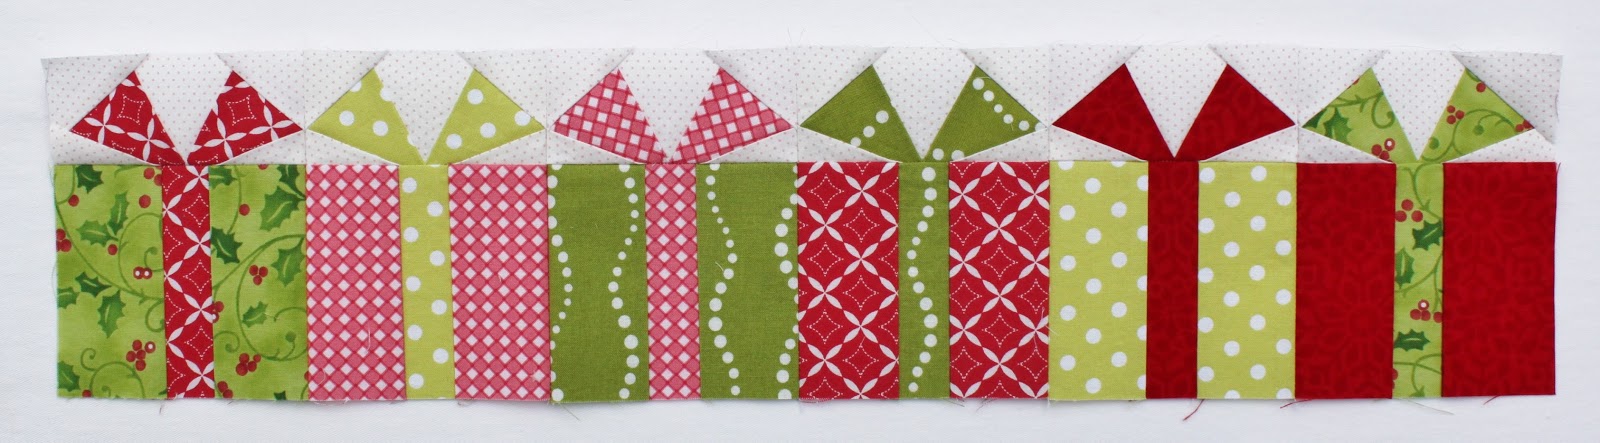
5. Stitch your 6 gifts in a row. Once again, you may want to take every other block and repress the seam allowance between the bow and box units, in order to help the seams nest together well. Press seams open.

Your row of gifts should measure 5″ x 21½” unfinished.
6. Now stitch 1 background fabric 1¾” x 21½” strip to the bottom edge of each of the Christmas tree, ornament, house, and pinwheel rows. Press seam allowances towards the background fabric strip.
7. And finally, stitch together all of the above units as shown, pressing seam allowances towards the background fabric strips. Your assembled quilt center should measure 21½” x 27½” unfinished.

Yay! You did it! Your quilt center is finished! Congratulations!
I’ll see you back here Tuesday for Day 7. We’ve got a bit more piecing to do before we move onto embroidery. Can’t wait!!
Comments on this entry are closed.
When I saw your quilt, all I could think was WOW! Absolutely gorgeous! I know I keep saying this, but I love your fabrics!
Ohh, it is really so merry and bright! Love the layout very much and the fabrics are just perfect. I also look forward to see what it looks like in my version, yay!
I'm so glad you like it, Jackie!! I'm loving the fabrics too!
I can't wait to see your version either, Martina! So much fun!!
Wow,it just stunning.Love your design and fabrics.Thanks you for sharing patterns.
My pleasure, Rosa!